
Chronically Delicious! |

|
|
Chronically Delicious! |
|
|
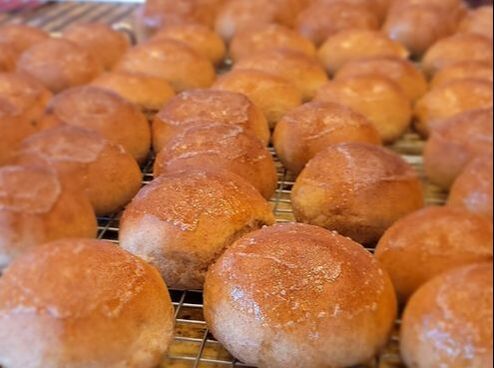
 If you're like me, baking bread is not your thing. Literally every time I have tried to make rolls in the past, they have turned out to be more like hockey pucks! My family always teases me to this day because I'm so well known for my hockey pucks! Haha! The good news is that I have FINALLY found a recipe that is simple, and my rolls turn out buttery soft every time! These rolls are so easy, and so good for dinners or even just for sandwiches. For any Lymie fighting the gluten-free battle, I'd highly recommend trying ancient grains. They aren't completely gluten free, but I have found that grains like spelt are something that my stomach can handle, even when I'm on hard treatments and herxing! Spelt is packed with nutrients, and it's a grain that hasn't been contaminated with GMO or harmful pesticides! Don't take my words for it though, try it out and comment below how it turned out! Spelt Dinner Rolls
Ingredients:
Directions:
0 Comments
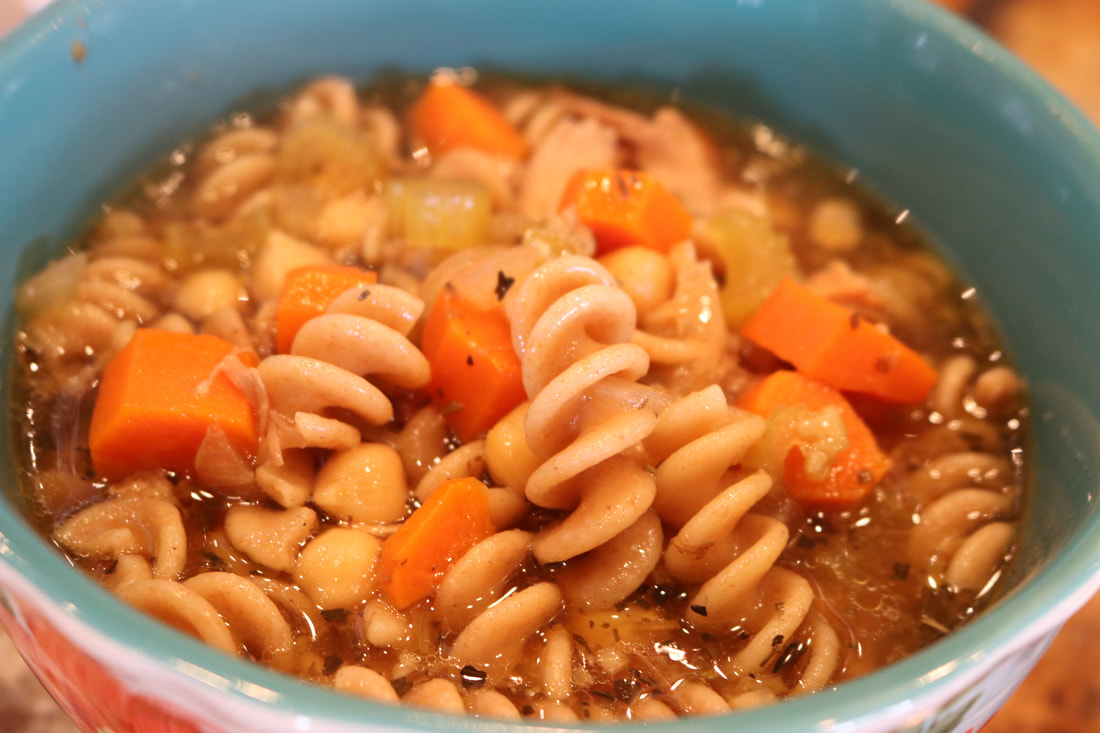
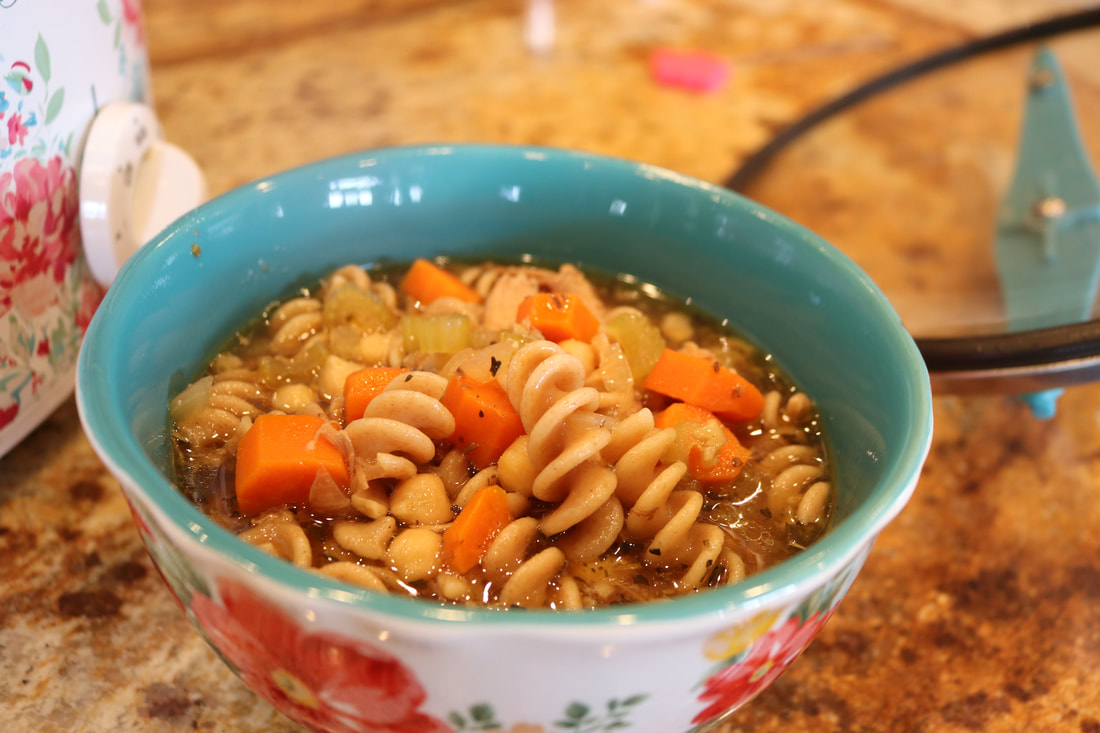
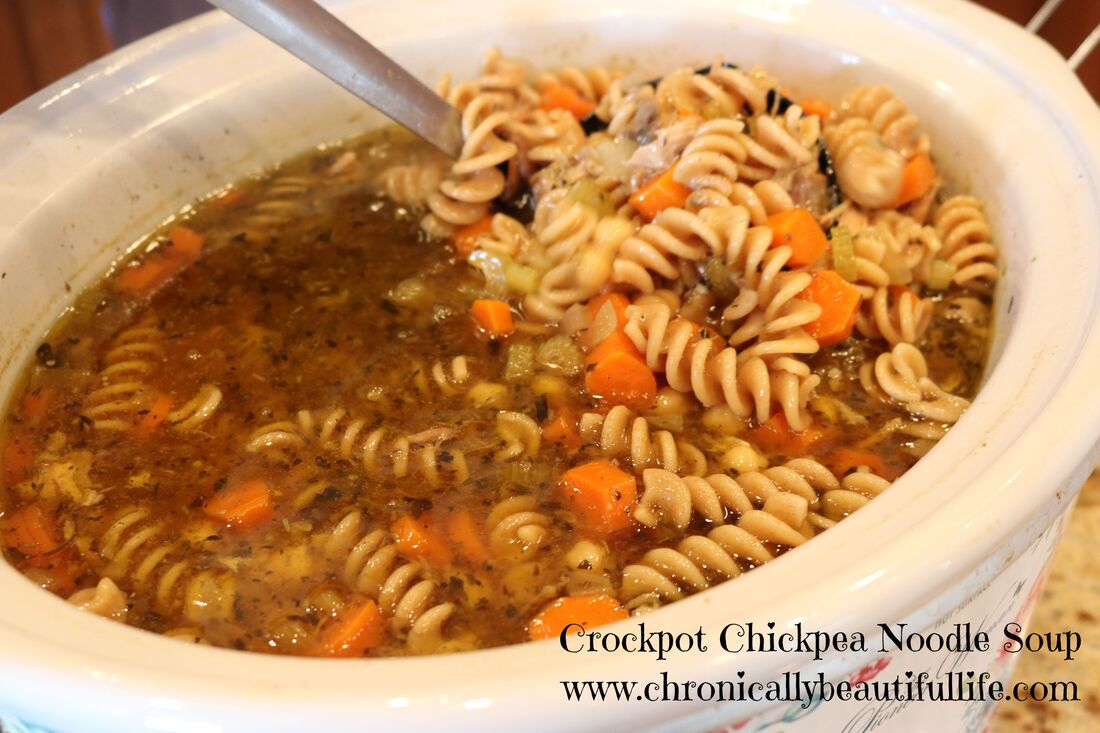 It's been a long time since I have posted a recipe, but I am jumping into cooking healthy again with both feet and I'm looking forward to sharing these knew healthy recipes with you! This recipe is an easy dump and cook soup. It cooks for half a day and it is full of flavor and nutrients! This soup is a GREAT option for any of our meat-free chronic illness warriors! Or if you're like me, and you like a little meat you can add some extra nutrients by using a chicken bone broth! Let me know if the comments what you think of this soup and if you love it as much as I did! :) Crockpot Chickpea Noodle Soup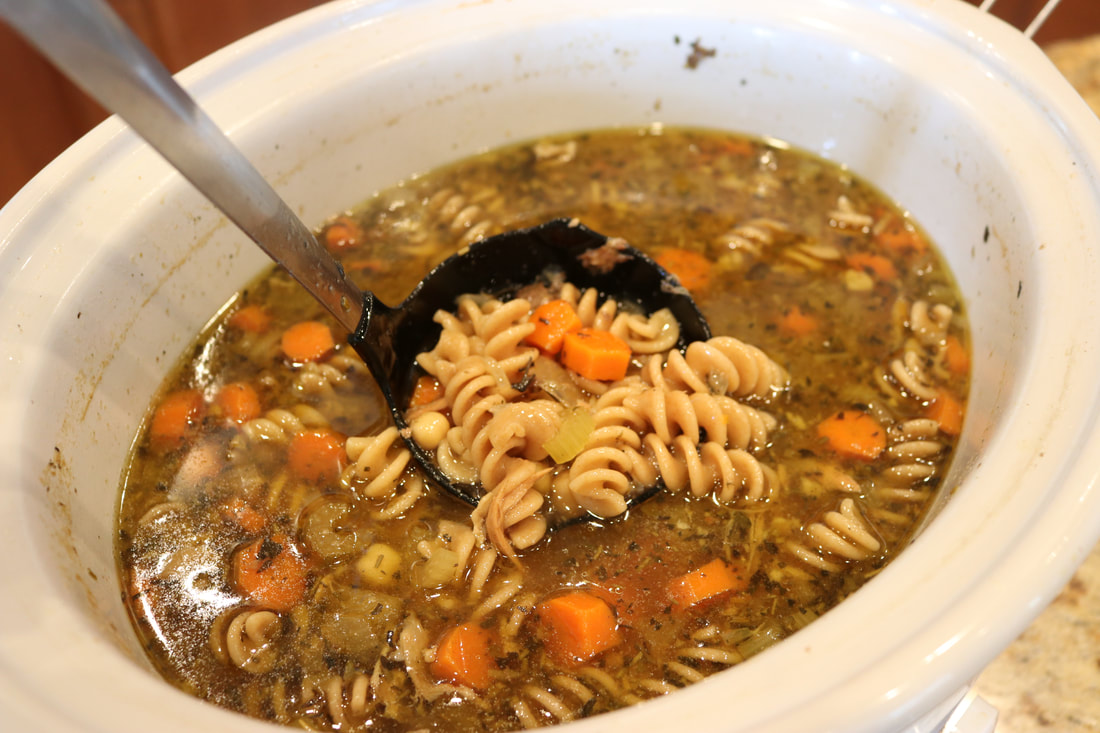
Ingredients:
Directions:
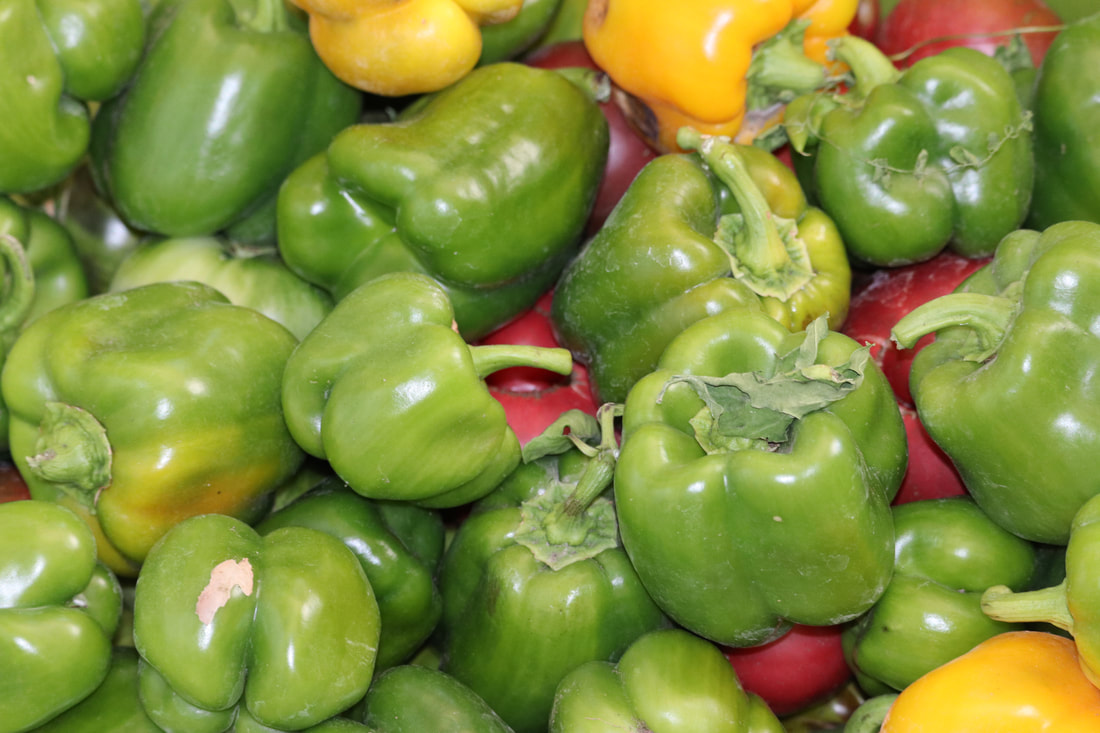
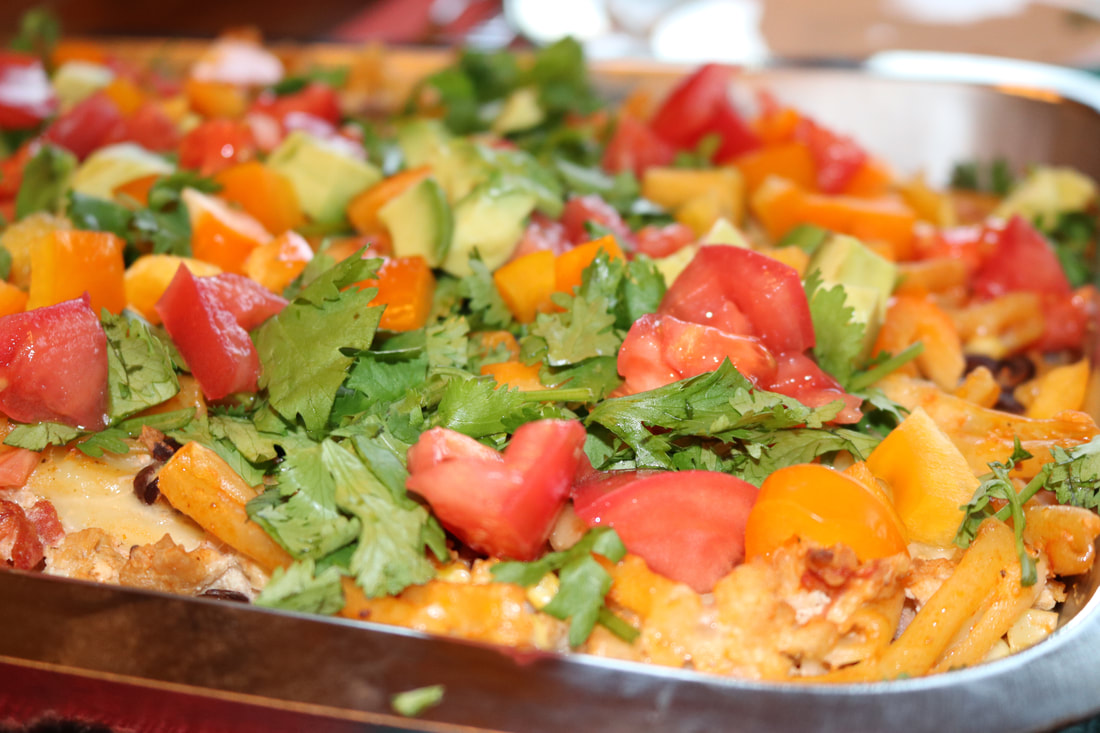
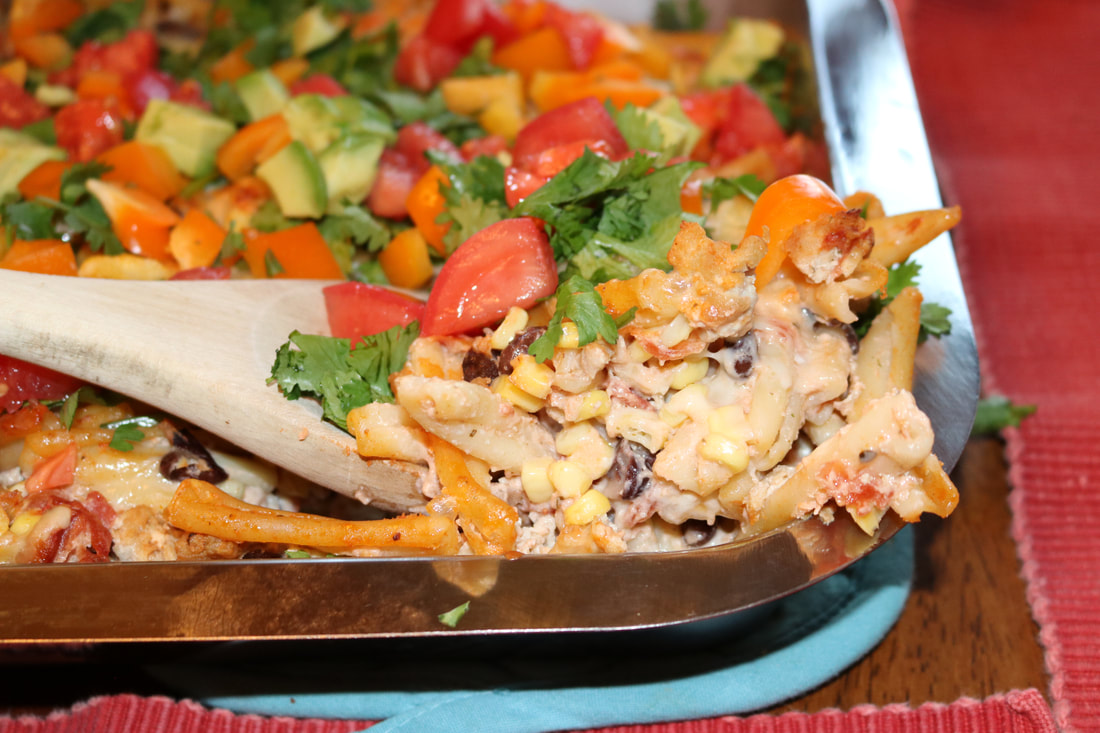
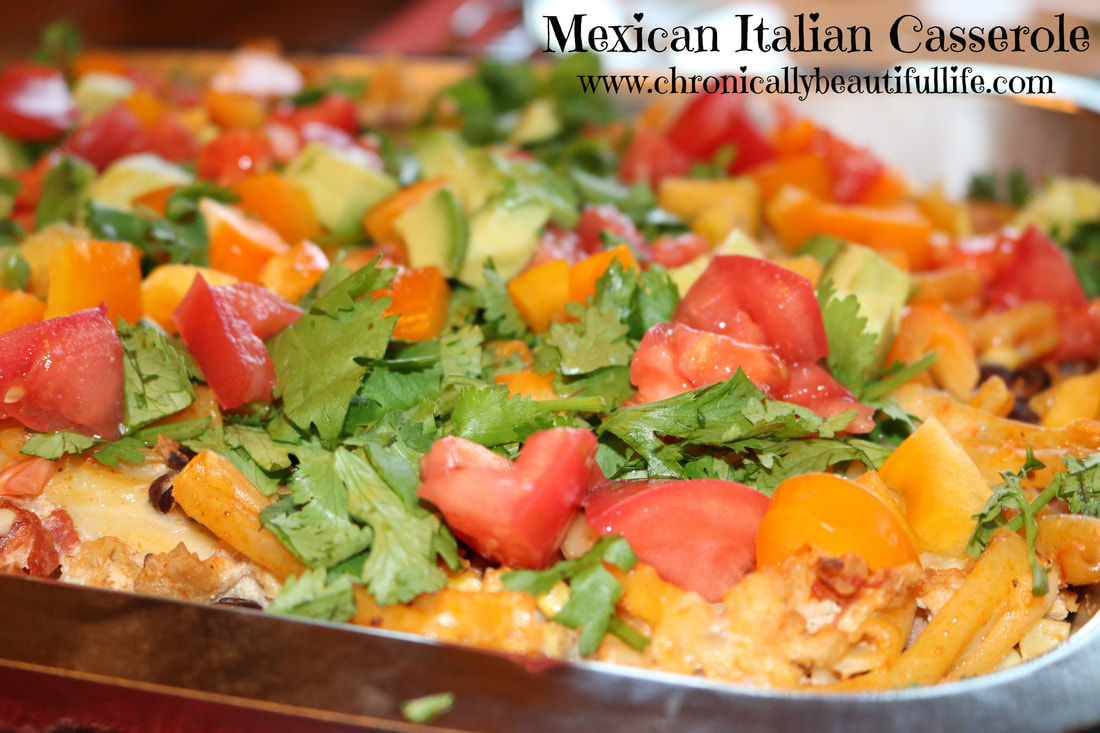 My family is a HUGE fan of Mexican food! Tacos, burritos, and enchiladas are a staple at my house, but every now and again it's nice to have something different, and so the Mexican Italian Casserole was born! This casserole is super versatile, meaning that if you're gluten free or you would rather have rice instead of pasta, you can easily do so. This recipe is also super simple, and completely organic for all of my chronic illness warriors that have sensitive stomachs like I do! So if you're a fan of Mexican... or Italian... than this is the casserole for you! Mexican Italian Casserole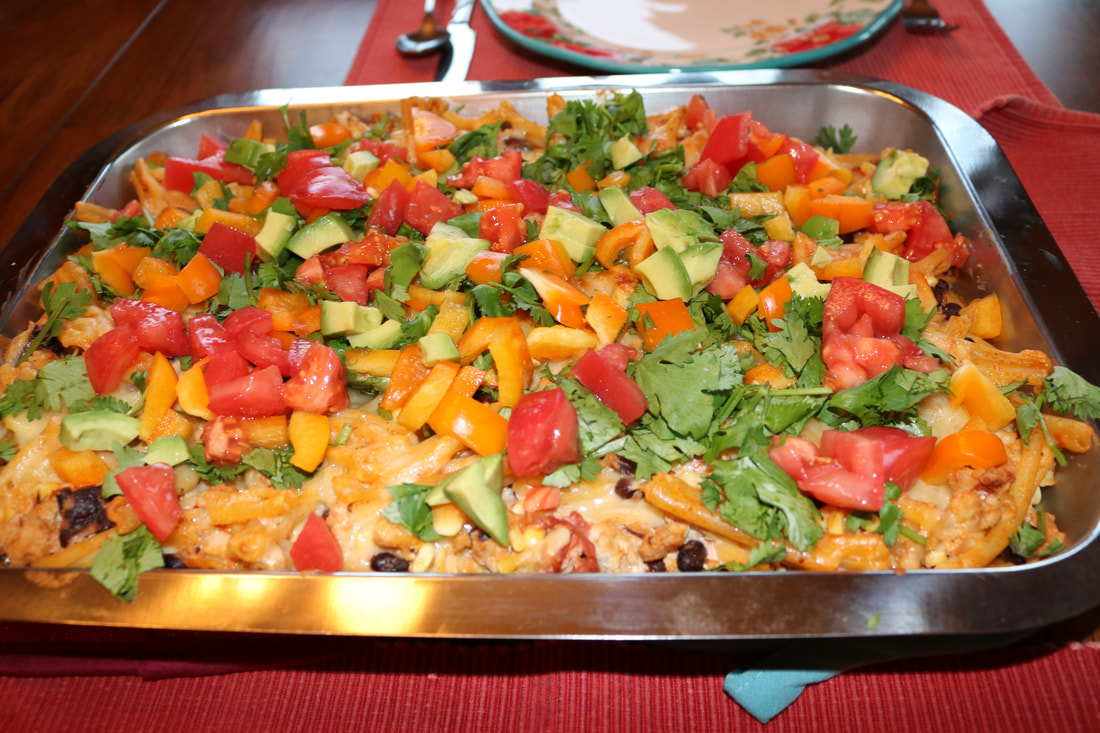
Ingredients:
2 1/2 cups of dried pasta 1 cup sour cream 1 cup salsa* 1 tsp. cumin 1 tsp. garlic powder 1 tsp. onion powder 1 cup frozen corn 1 can (15 oz) black beans (drained and rinsed) 2 cups of cooked shredded or ground chicken 2 cups shredded cheese chopped pepper chopped avacado chopped cilantro chopped fresh tomato *I used homemade canned salsa, but you can easily use organic salsa from the store as well. Directions:
**Use organic ingredients when feasible!
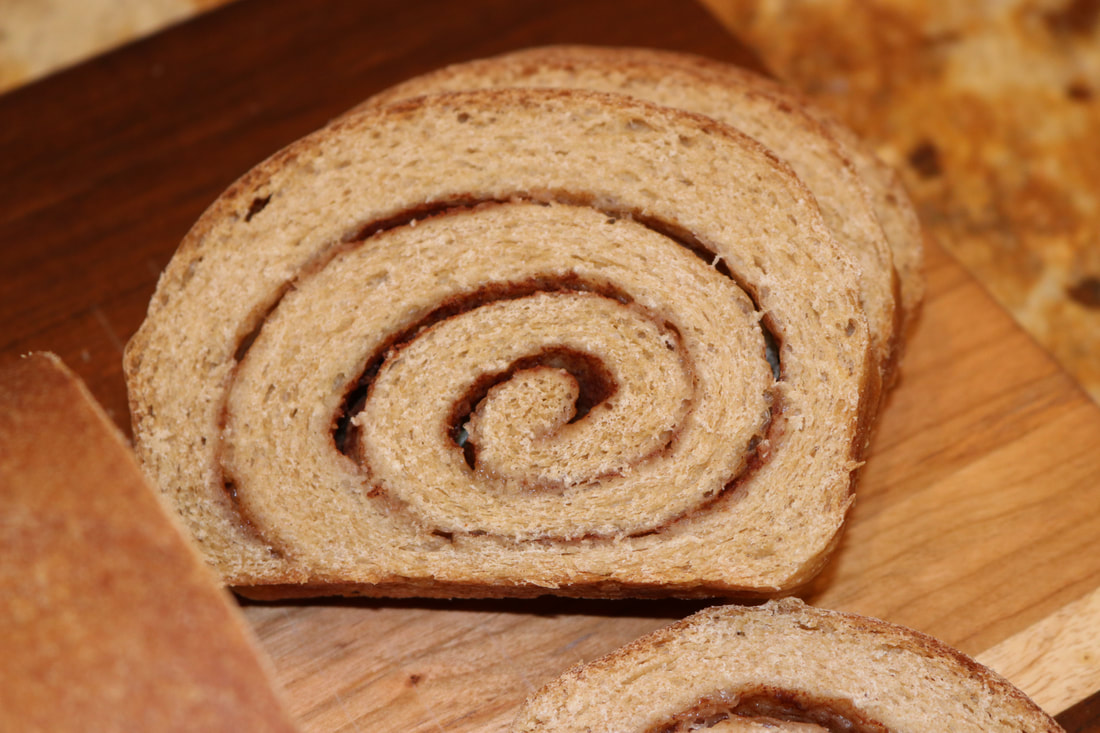
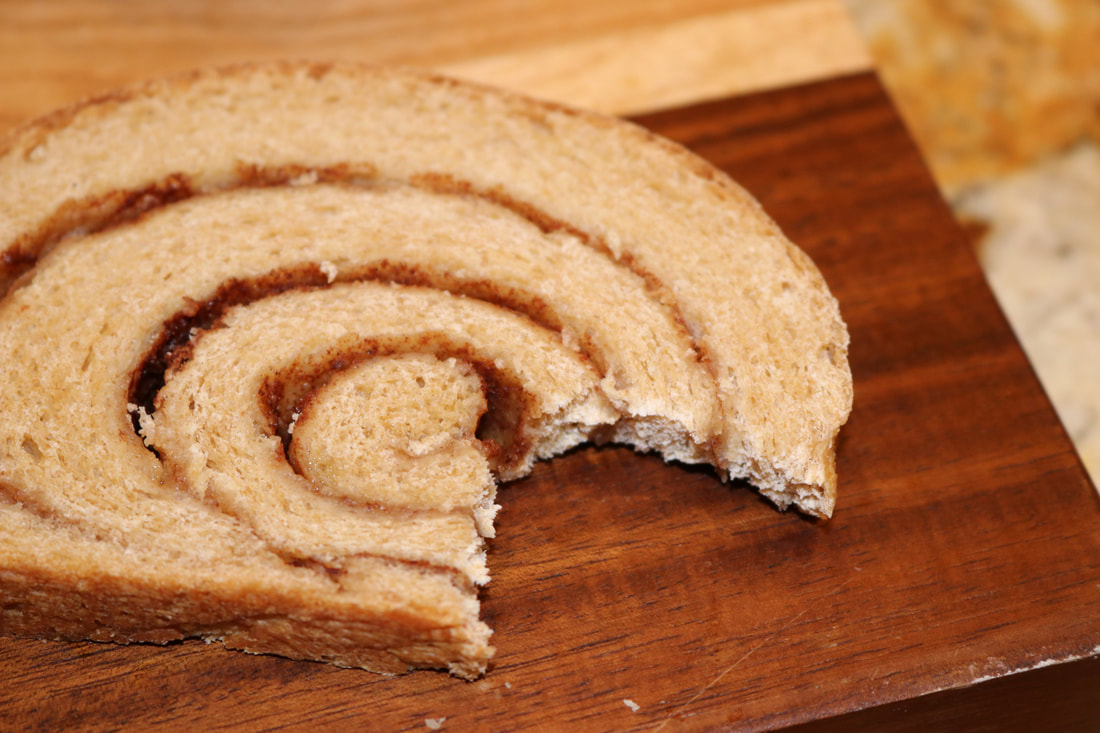
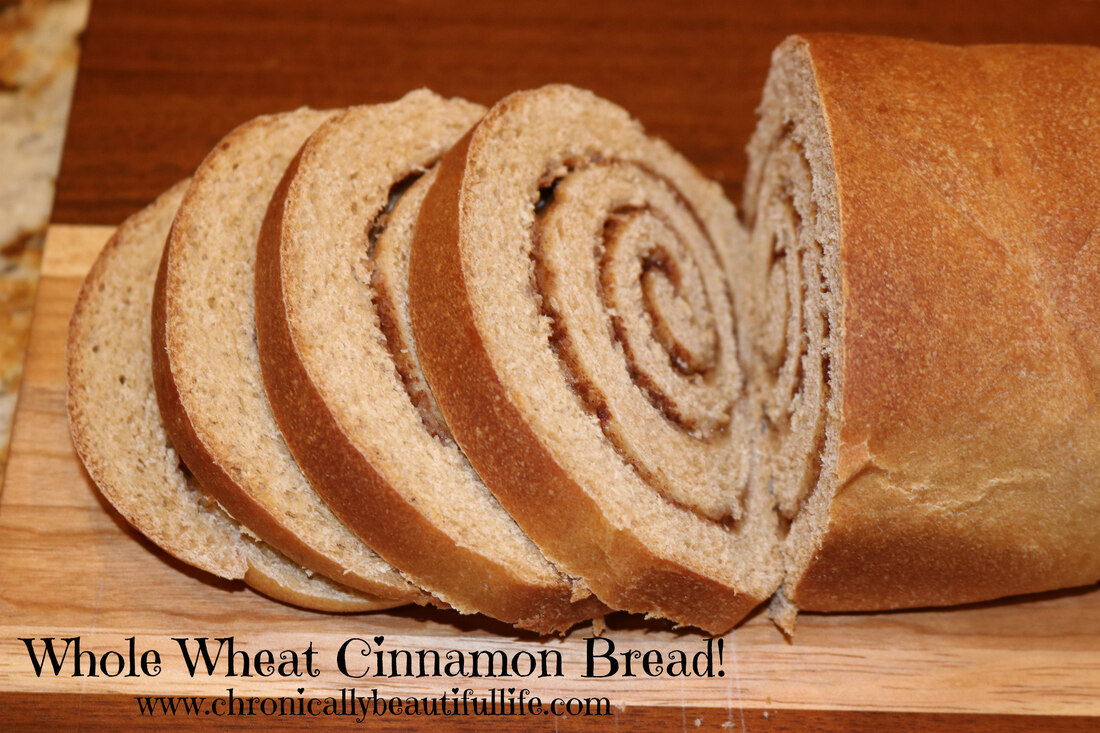 Sweetbread that is 100% organic and refined sugar-free!? I think yes! One of the questions I receive a lot about my health and my diet is about gluten. Gluten is a great controversy in the modern food war, and for me, I've found that it's not so much the gluten that does harm in people with certain autoimmune diseases, but it's the KIND of gluten. Wheat and flours that are highly saturated in pesticides and other chemicals can cause great havoc on a body that is already compromised, and after being gluten-free for a year, I've found organic whole wheats that don't make me sick and that I love feasting upon! With that said, I'm all for those who find that a diet without gluten makes them feel better. Health is all about listening to your body and doing what's best for YOU! This bread is made with organic whole wheat flours, and sweetened with raw honey and Lakanto monk-fruit sweetener! It's the perfect treat to curve that sweet tooth without overdoing the sugar intake for the day, and tastes amazing with butter or jam! Whole Wheat Cinnamon Bread!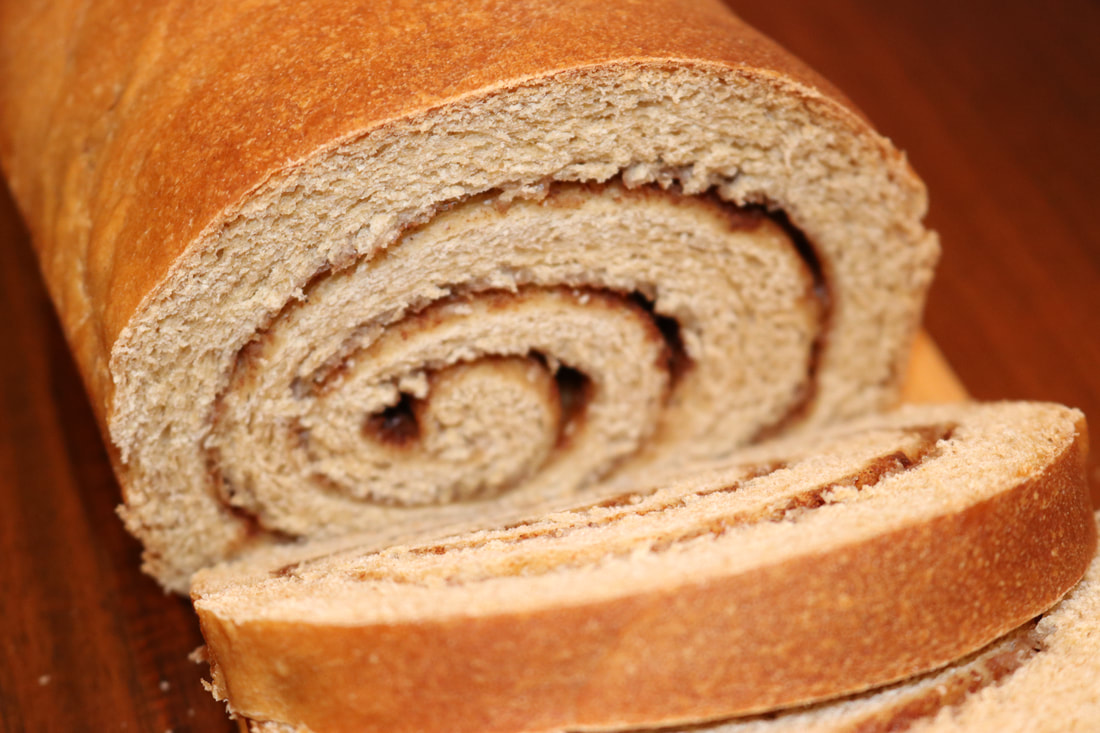
Ingredients:
1 egg 1 cup warm water 1 Tbs. organic butter (melted) 1/4 cup raw honey 1 1/2 tsp salt 4 cups whole wheat bread flour 2 tsp. active dry yeast 1/2 cup classic Lakanto sweetener 1 Tbs. cinnamon Directions:
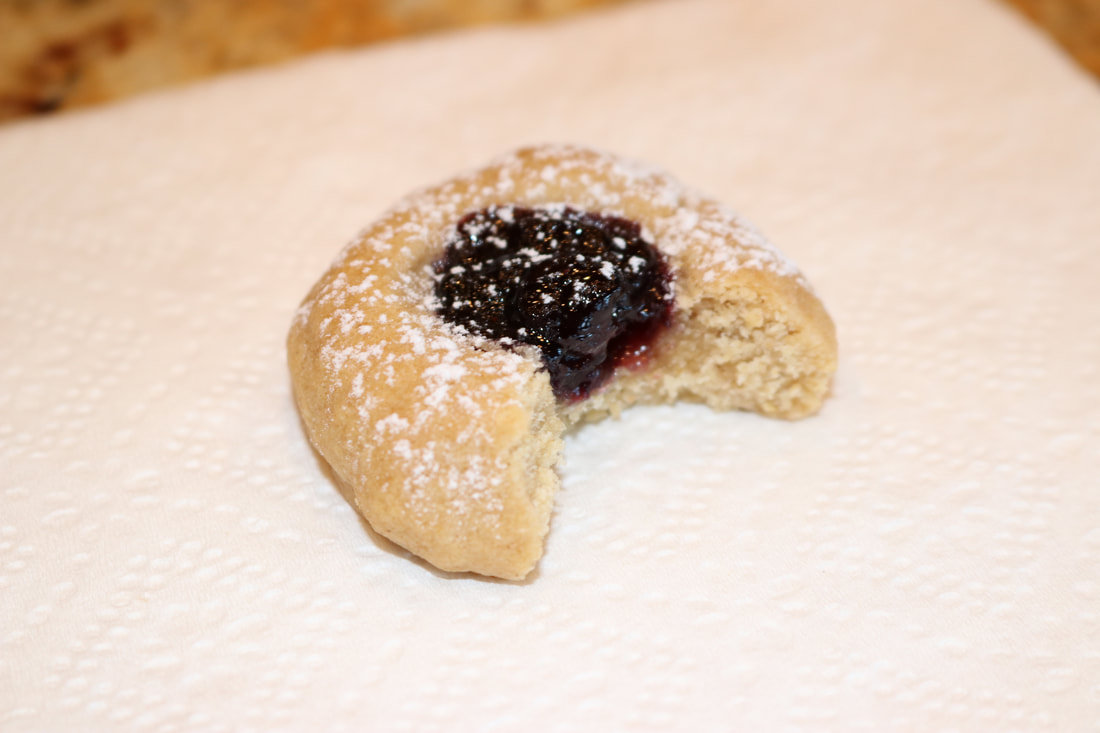
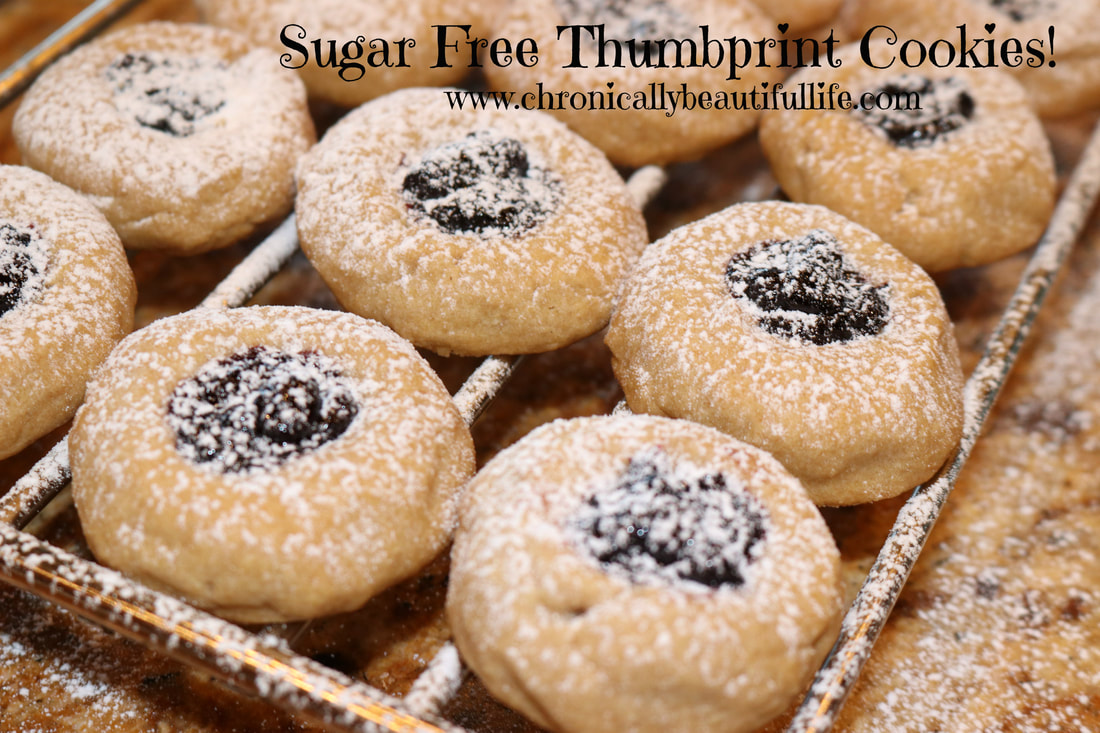 Let's talk food for just a minute here... How many of you often feel overwhelmed by the massive amount of information that is out there about food and nutrition? I honestly believe that if you listen to every single "expert" there is out there, you would probably be forced to result to eating nothing, as tips on diet and nutrition can often be contradicting and counter productive. This is why it SO IMPORTANT that we learn to eat what is right for YOUR body! It's important to listen to your body and what it's trying to tell you because I guarantee you that if you eat something that isn't good for you, your body will be sending you that message the next day. The war on food is raging in our day and I think everyone is forgetting that we're ALL IN THIS TOGETHER! I am not against people who eat gluten-free, as I know people who thrive on gluten-free diets, even if I don't. Same goes for any other diet (Keto, Paleo, etc). And to those who eat foods that are full of chemicals, overly processed, and full of sugar that is incredilby unhealthy for your body: I will ALWAYS encourage you to eat healthy because I care. But I will NEVER look down on you or make you feel like you are less of a person if you choose to eat processed, sugar filled food. Again, we're all in this together and as we teach with love and compassion we can all help each other on our roads through life. I eat 100% organic and refined sugar-free because that is how I can function with Lyme disease and how I can still live a life despite my chronic illness. Not because I'm trying to outrun anyone else in this life. So without further ado, I'd like to introduce the sugar-free Thumbprint Cookie! These cookies are completely sugar free, organic, and free of harmful additives and chemicals. They are made with whole wheat flour and they still melt in your mouth! They're also sweetened with Lakanto Monkfruit sweetener which is full of nutrients and approved for all kinds of healthy diets! Sugar Free Thumbprint Cookies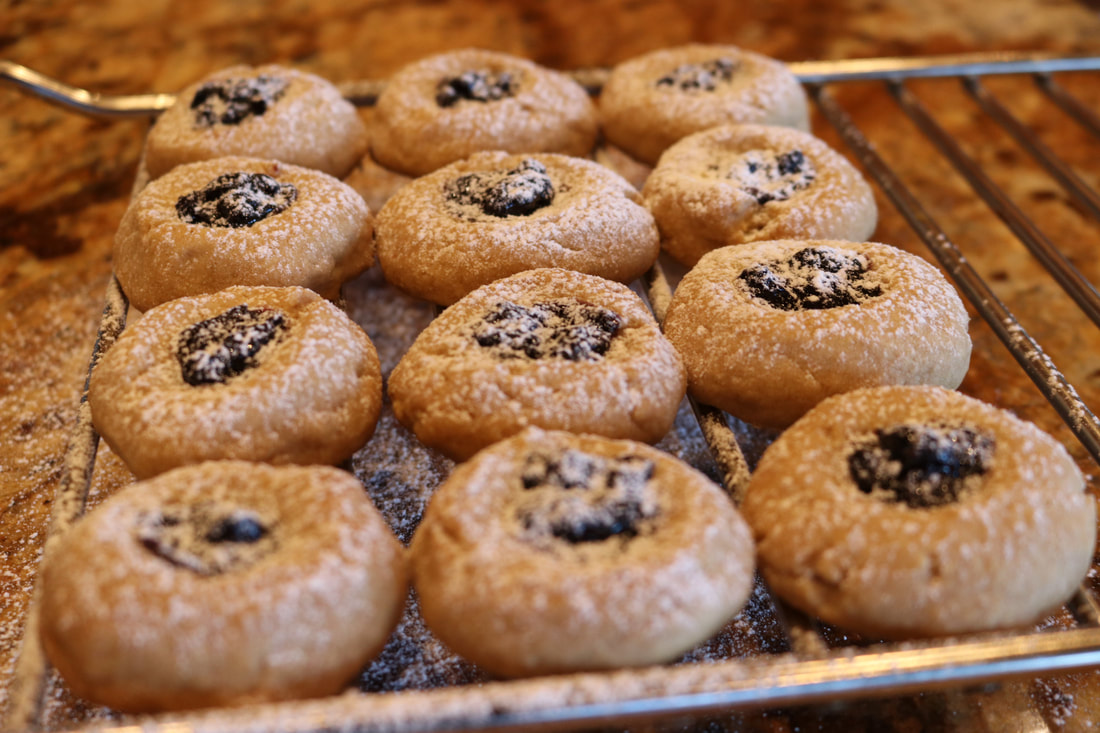
Ingredients:
Directions:
*If you don't have a the powdered version of your Lakanto sweetener, you can take one cup of classic Lakanto sweetener and blend it in a blender on high until it is in powdered form. **Make sure you use the right kind of flour, for if you only use bread flour your cookies will be dry and if you only use pastry flour your cookies will fall apart. ***You can use any kind of fruit preserves that you like. I used organic, sugar free, wild blueberry jam that I ordered from Thrive market.
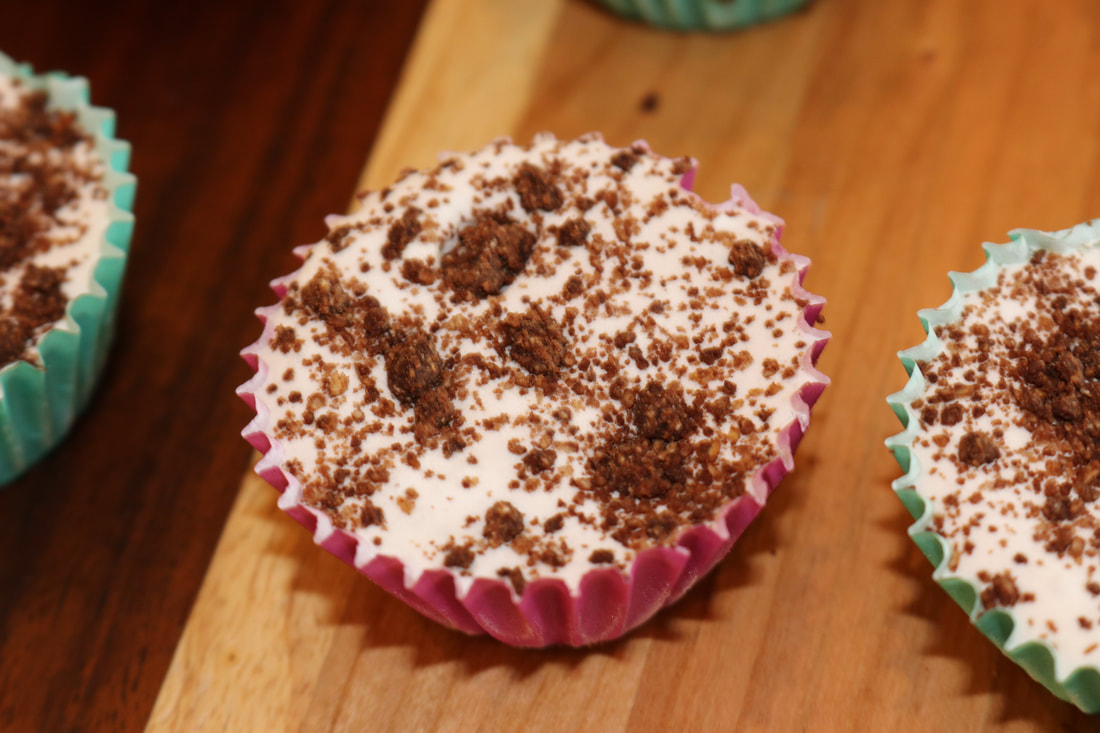
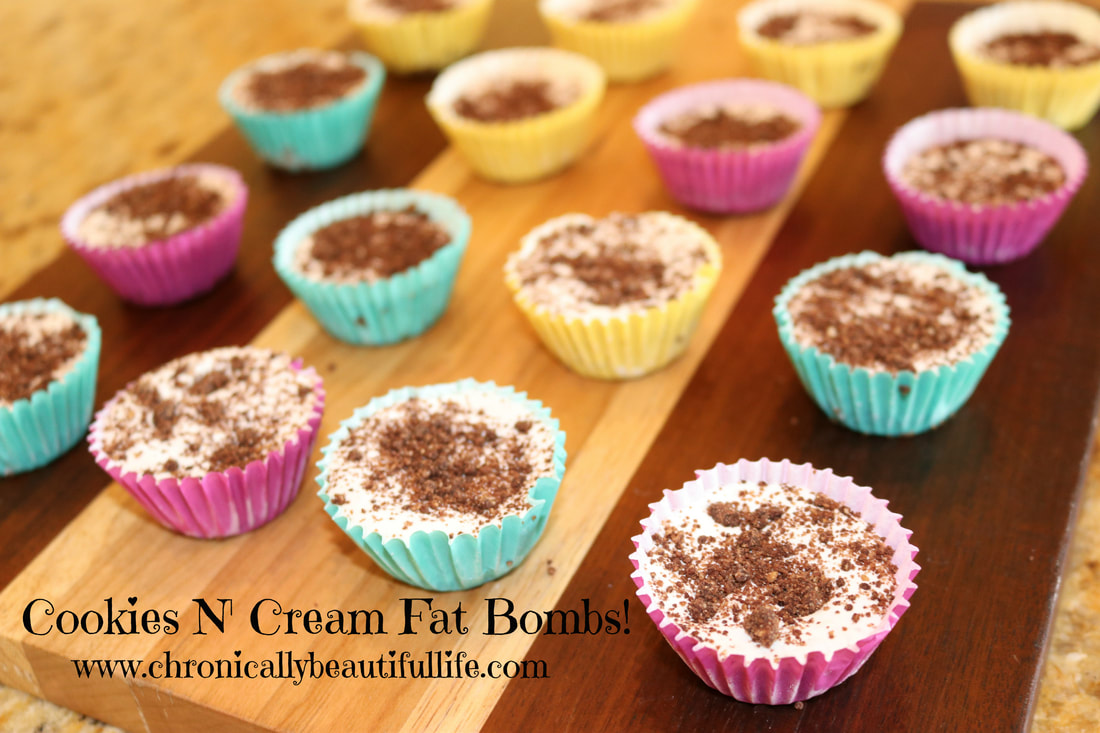 Still on my quest for healthy ways to gain weight, and these babies are AMAZING! They're like little ice cream bites, and they taste just like cookies and cream ice cream! The wonderful thing about them is that they use no Oreos, no additives, and no chemicals! Let's be real here, Oreos are practically a chemical cocktail, and our bodies do not need the extra toxins! These fat bombs are, gluten-free, sugar-free, organic, Paleo, Keto, and absolutely DELICIOUS! The cookie part is made with almond flour and cacao powder, and they're really easy to convert to dairy-free if you don't eat dairy! Cookies N' Cream Fat Bombs!
Ingredients:
For the "Oreo Cookie" Crumbs: 2/3 cup almond flour 2 Tbs. cacao powder (heaping) 3 Tbs. Lakanto powdered sweetener 2 Tbs. butter (melted) pinch of salt For the Vanilla Cream: 2/3 cup full fat coconut milk 4 Tbs. Lakanto powdered sweetener pinch of salt 2/3 cup of heavy whipping cream (or chilled coconut cream) 2 tsp. vanilla extract Directions:
*Use organic ingredients when feasible!
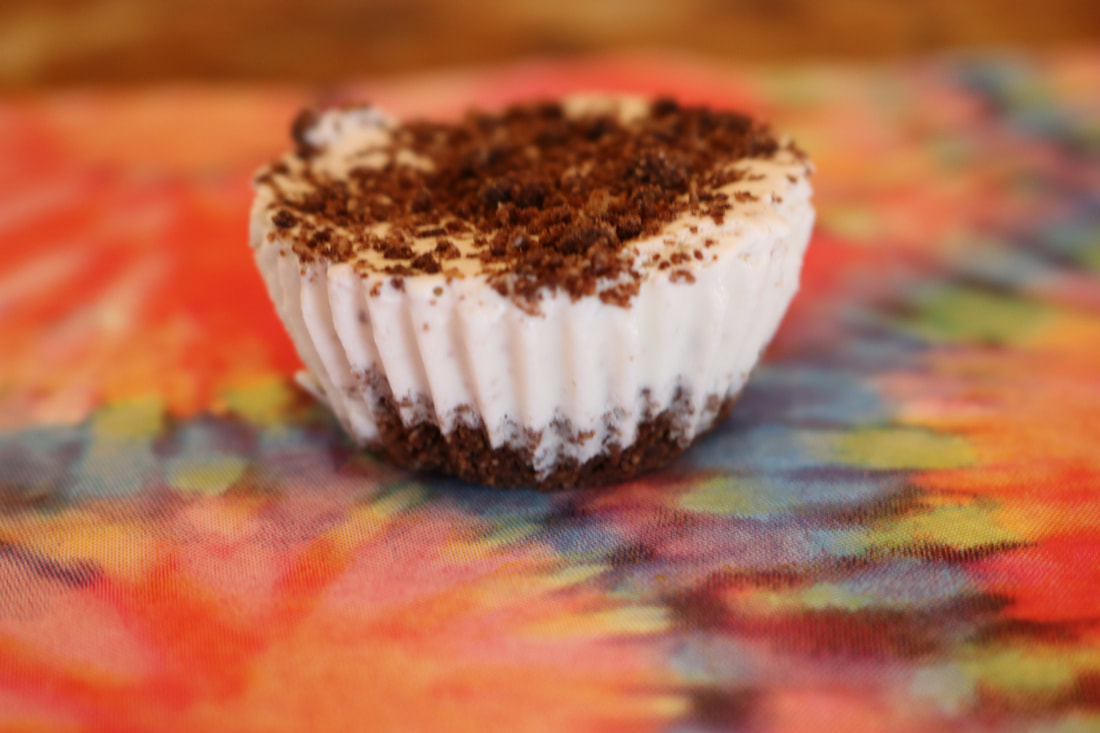
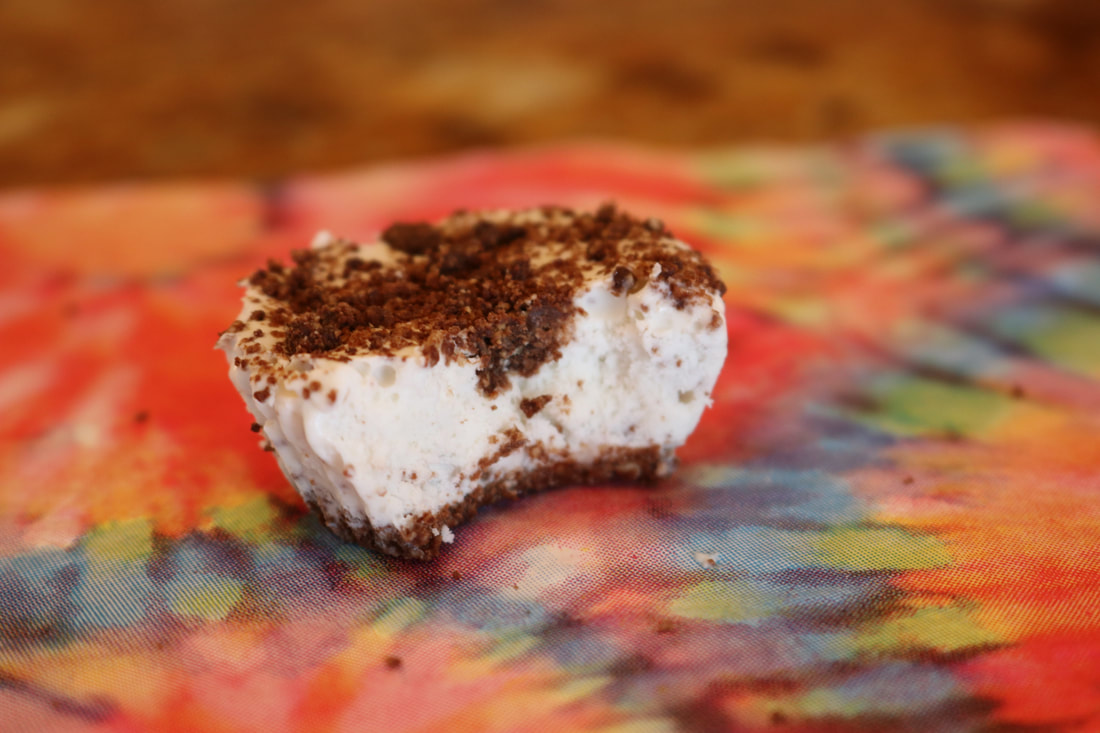
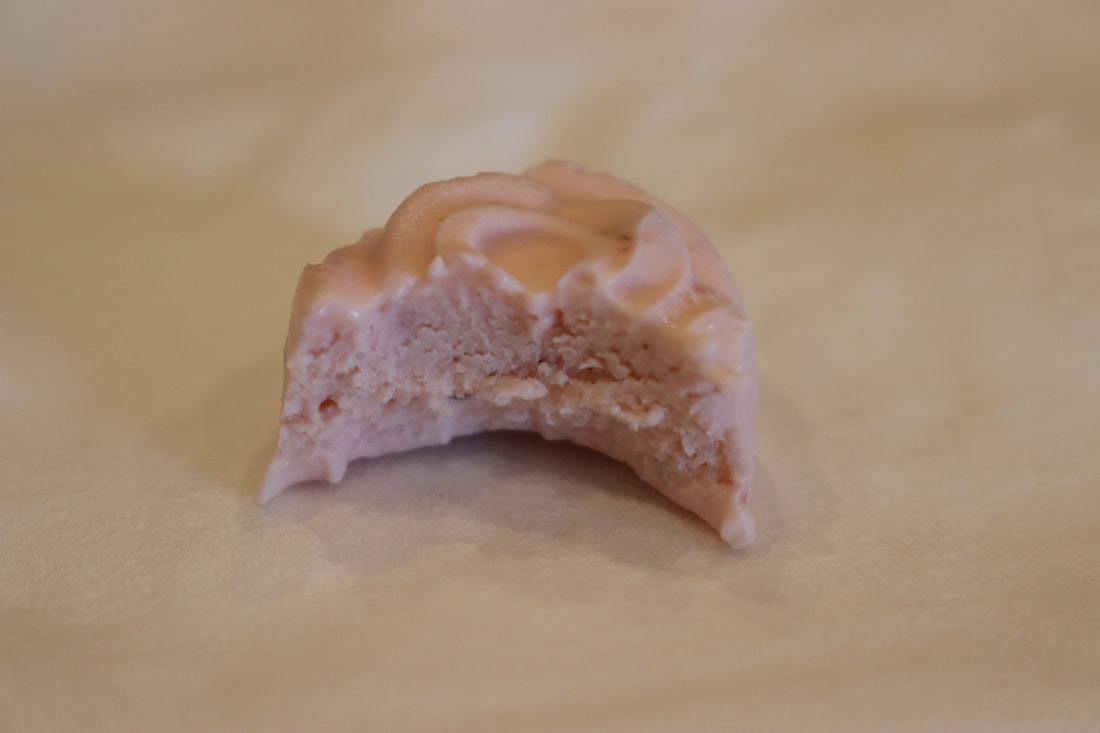
 I'm currently on a fat bomb kick, and these are my first try at fat bombs! For me, Lyme disease makes it super difficult to gain weight, and so I'm currently on the lookout for any snack recipe that is full of healthy fats! This recipe is SUPER easy to make and only takes about 10 minutes of prep time! It's also organic, sugar-free, keto, paleo, and gluten-free! These babies are glorious little summer treats and taste like mini little cheesecake bites! Delicious! Easy! And Beautiful! My favorite combination! Keto Cheesecake Fat Bombs!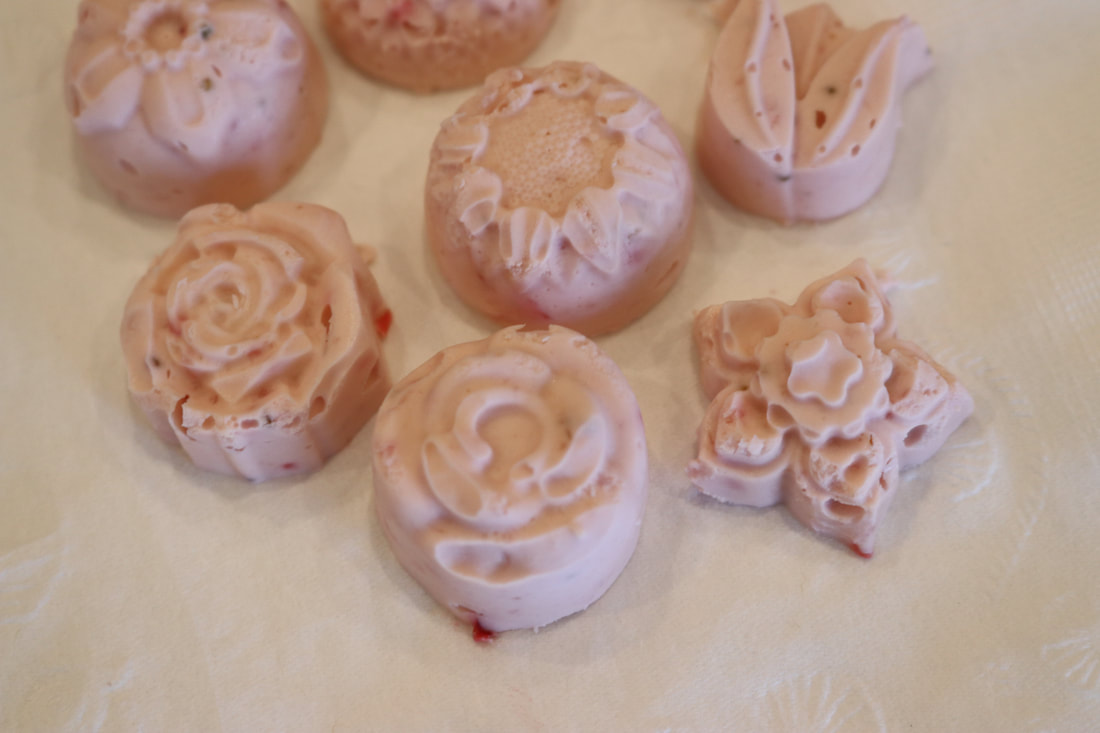
Ingredients:
6 oz. organic cream cheese 4-5 medium strawberries (fresh) 4 Tbs. salted butter 3 Tbs. powdered monkfruit sweetener 2 tsp. vanilla extract Directions:
*Use organic ingredients when feasible
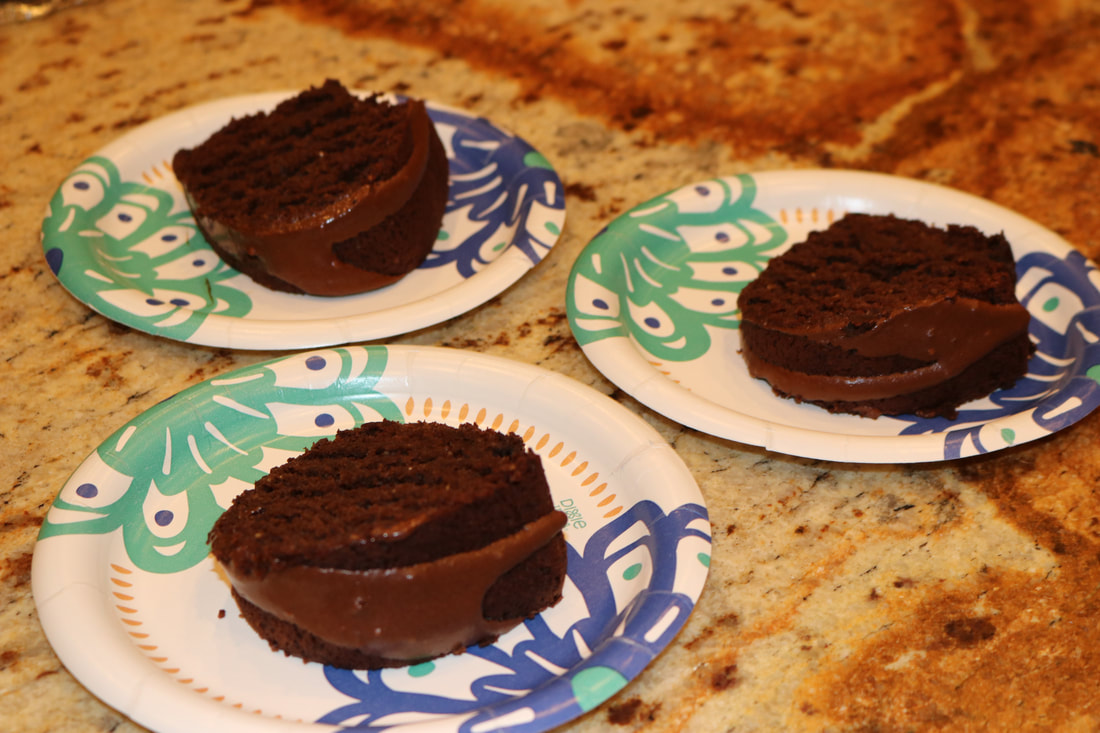
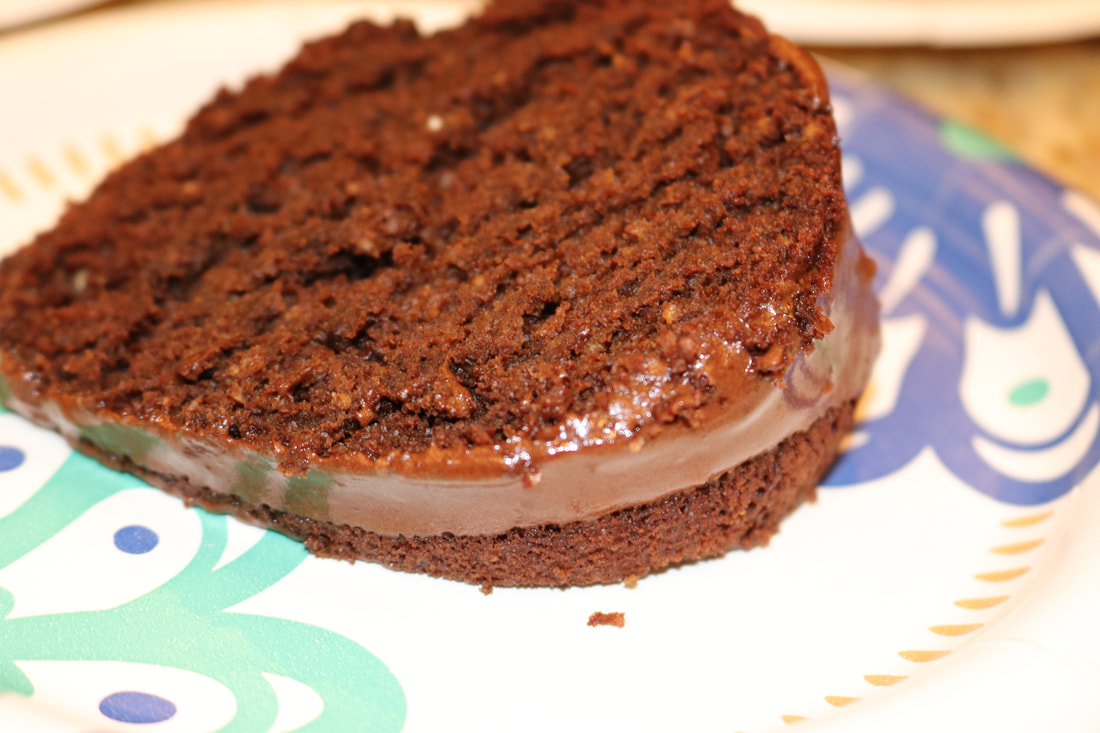
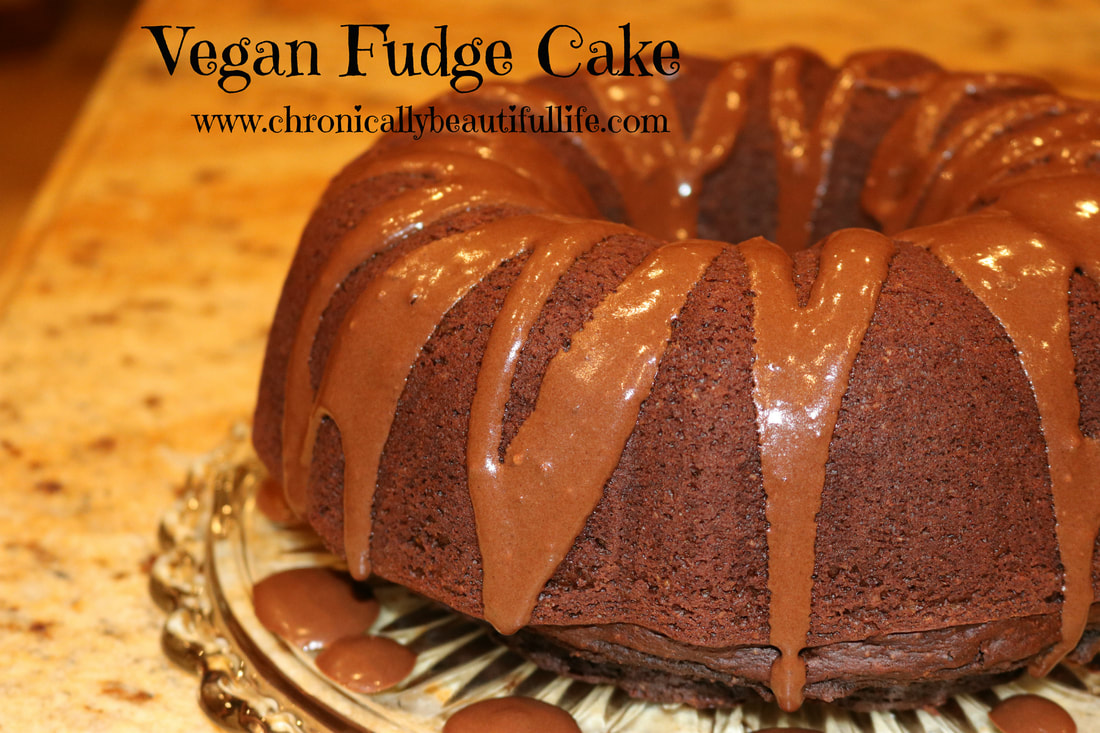 Who doesn't LOVE chocolate!? I've always been a chocolate lover and when I was diagnosed with Lyme I thought I would have to give up chocolate for good! The good news is that I really only gave it up for a year, and I found healthy ways to eat chocolate in small proportions so it doesn't make me sick! This chocolate cake was a hit for my whole family and it's completely organic, refined-sugar free, AND vegan! Yep, that's right! No animal products in this cake! I also have found in my healthy baking pursuit that it's really difficult to make healthy cakes that aren't super dry, but I've FINALLY mastered a refined sugar-free recipe that is super moist and very fudgy on the inside! Even the glaze is sugar free and it adds the final finishing touch to this beautiful cake! I also used cacao powder in this recipe instead of cocoa. Cacao is considered a super food and helps boost your mood and your immune system! Eating chocolate in the right amounts can be good for your body! What a relief!! Vegan Fudge Cake!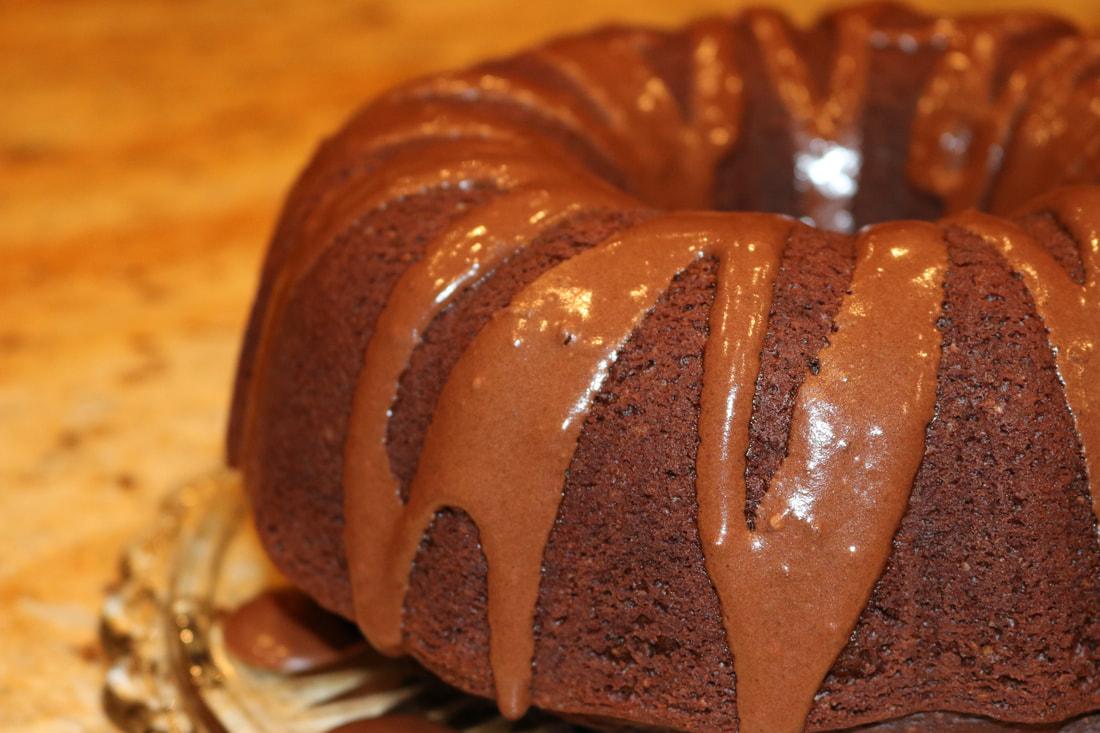
Ingredients:
2 cups coconut milk 2 Tbs. apple cider vinegar 1/2 cup raw honey 1/2 organic maple syrup 2/3 cup organic grapeseed oil 2 Tbs. pure vanilla extract (Yes that's correct! Bring on the flavor!) 1 cup whole wheat pastry flour 2 cups whole wheat bread flour 2/3 cup cacao powder (sifted) 2 tsp. baking soda 1 1/4 tsp. salt Chocolate Glaze: 2 Tbs. coconut oil, melted (or if you don't mind it not being vegan you can use organic butter) 1/4 cup powdered Lakanto sweetener 1 Tbs. cacao powder 2-3 Tbs. coconut milk 1 tsp. vanilla extract Directions:
*Use organic ingredients when feasible.
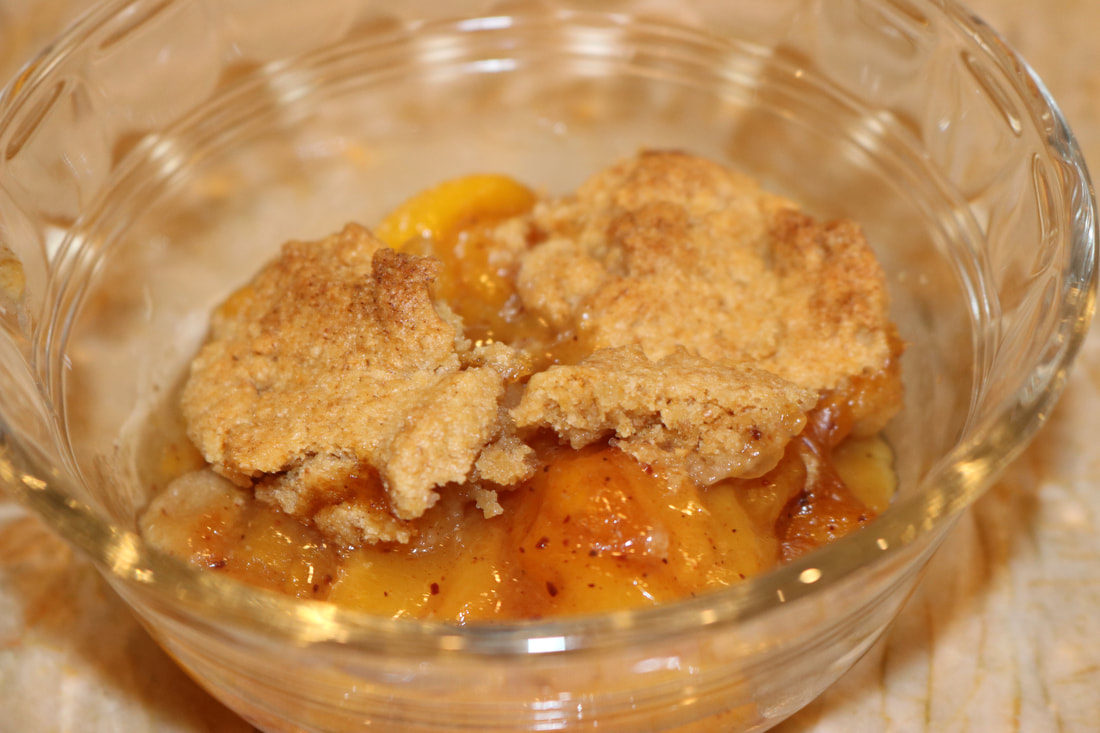
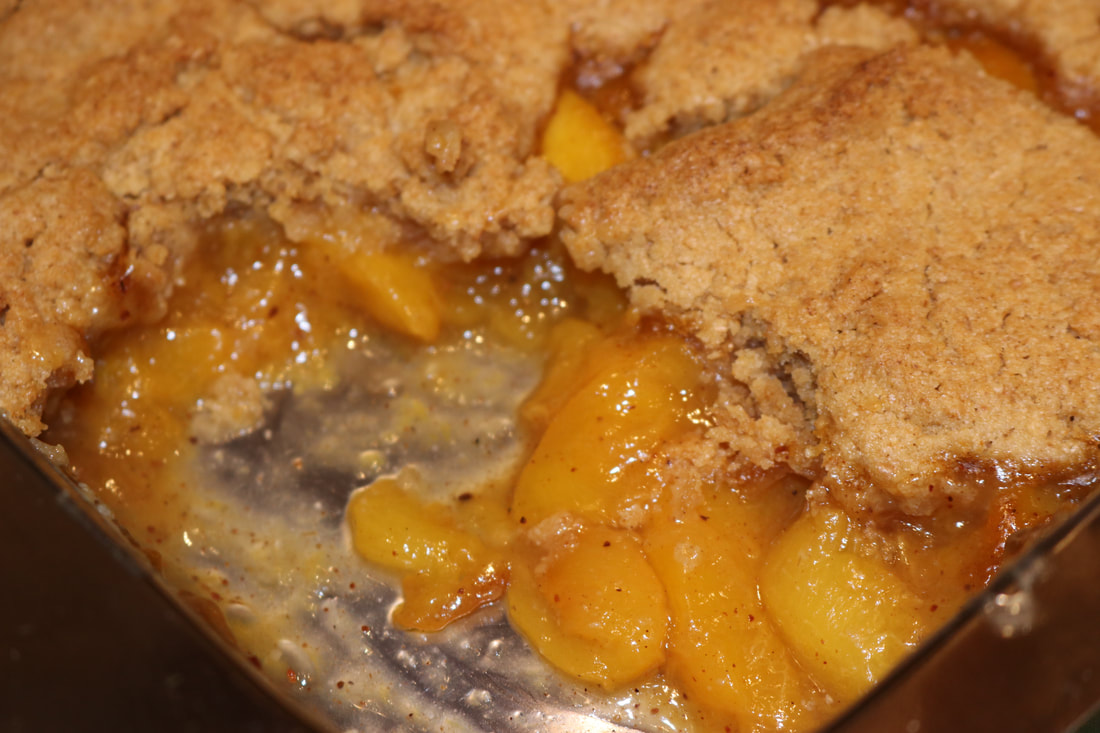
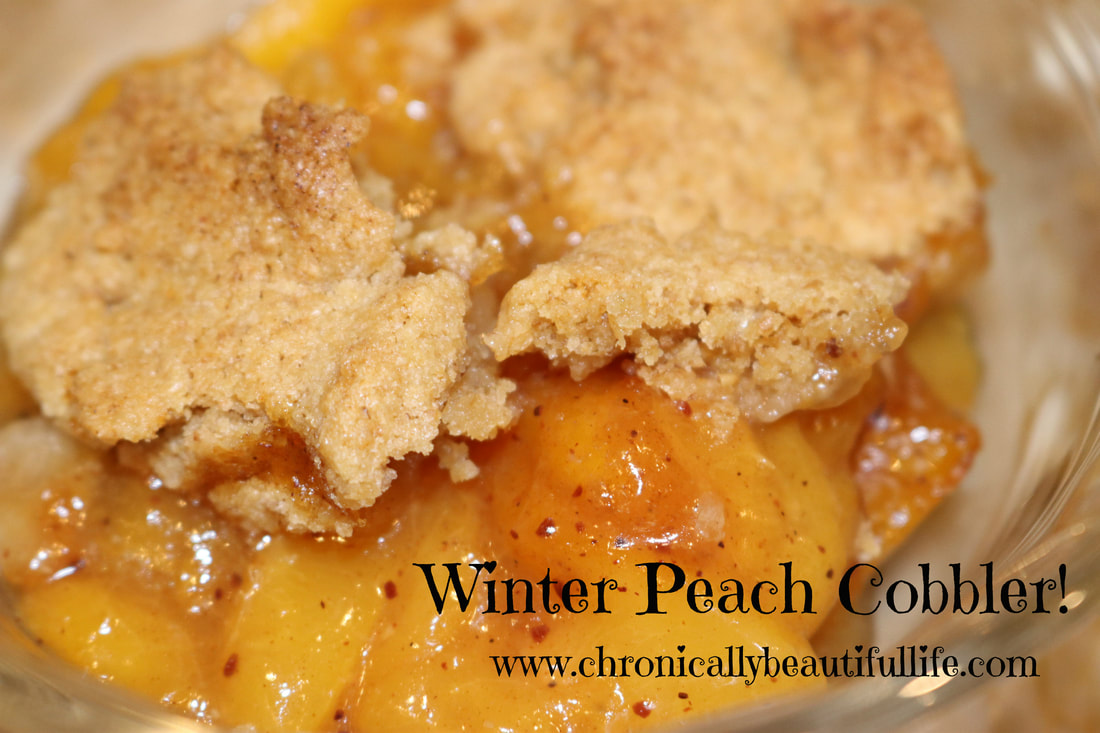 I know what you're all thinking... "Why am I calling this WINTER peach cobbler?!" Well, because it's winter, and peaches are not in season in the winter time, and yet... here we are! The secret is that I just happen to have a brother that has a lot of peach trees that produce in the summer, and so we spent a lot of time slicing and freezing peaches this summer! The rewards of that are now being feasted upon! It's like having fresh peach cobbler in the winter! Yum! This cobbler turned out delicious and is super easy to make! It's refined sugar-free and and made with organic whole wheat flour! It's also super versatile (most cobblers are), so it would be really easy to make this gluten free if you'd like that to be an option. Simply replace the whole wheat flour with almond flour and your have your gluten free winter treat! You can also top it with organic heavy whipping cream, or if you're dairy free you could top it with coconut cream for your finishing touch! Winter Peach Cobbler!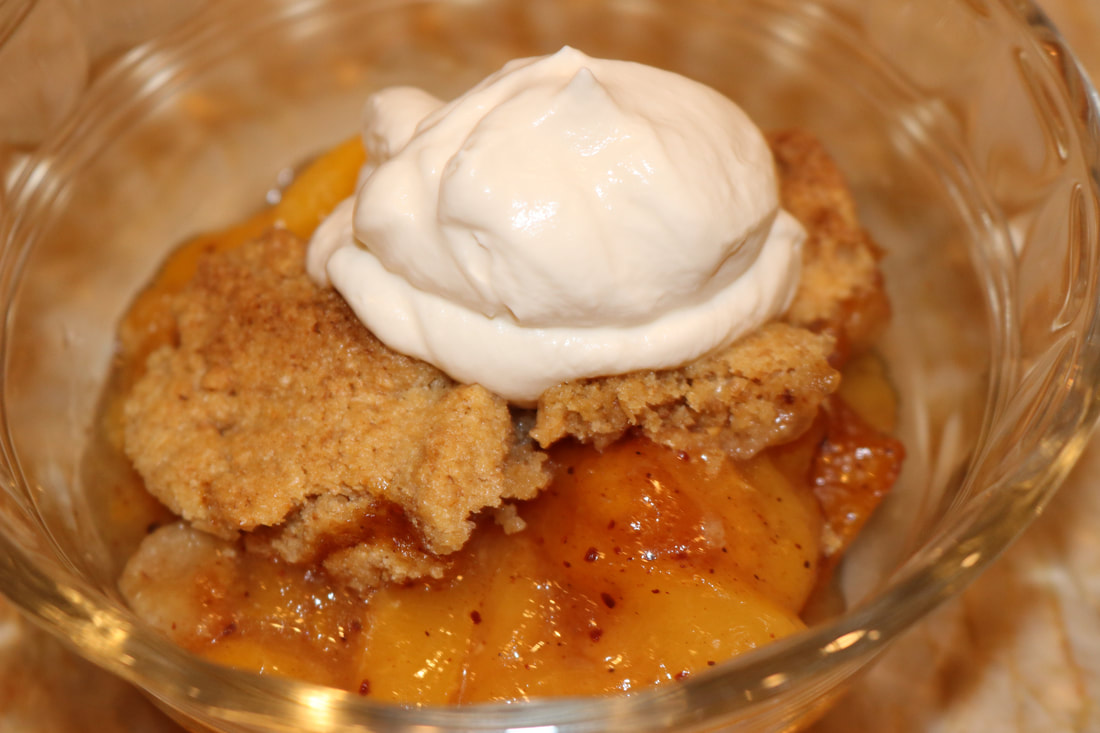
Ingredients:
Filling: 4 cups frozen peaches 1/4 cup organic maple syrup 2 tsp. vanilla extract 1-2 tsp. cinnamon (depending on how cinnamon-y you like it) 1/2 tsp. nutmeg 1/4 tsp. clove 1 Tbs. organic corn starch 2 Tbs. water Cobbler: 1/2 cup butter, melted (organic and grass-fed) 2 cups whole wheat flour 1/2 cup organic maple syrup 1/2 tsp. salt 1 tsp. vanilla Directions:
*Use organic ingredients when feasible.
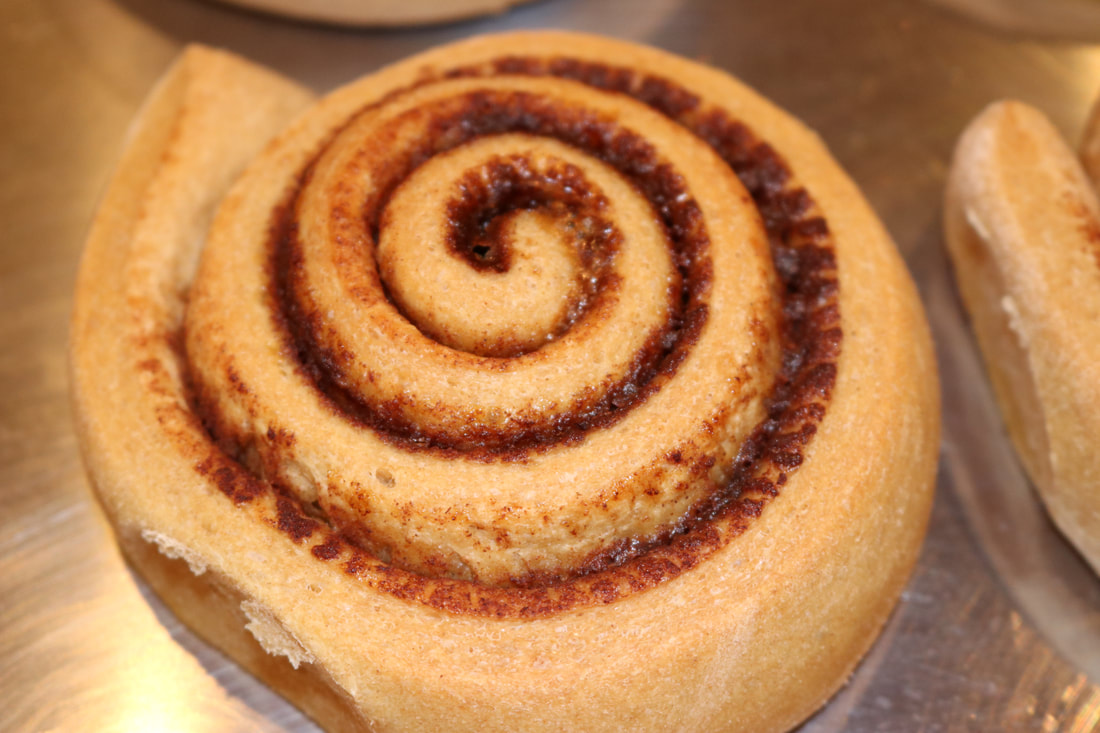
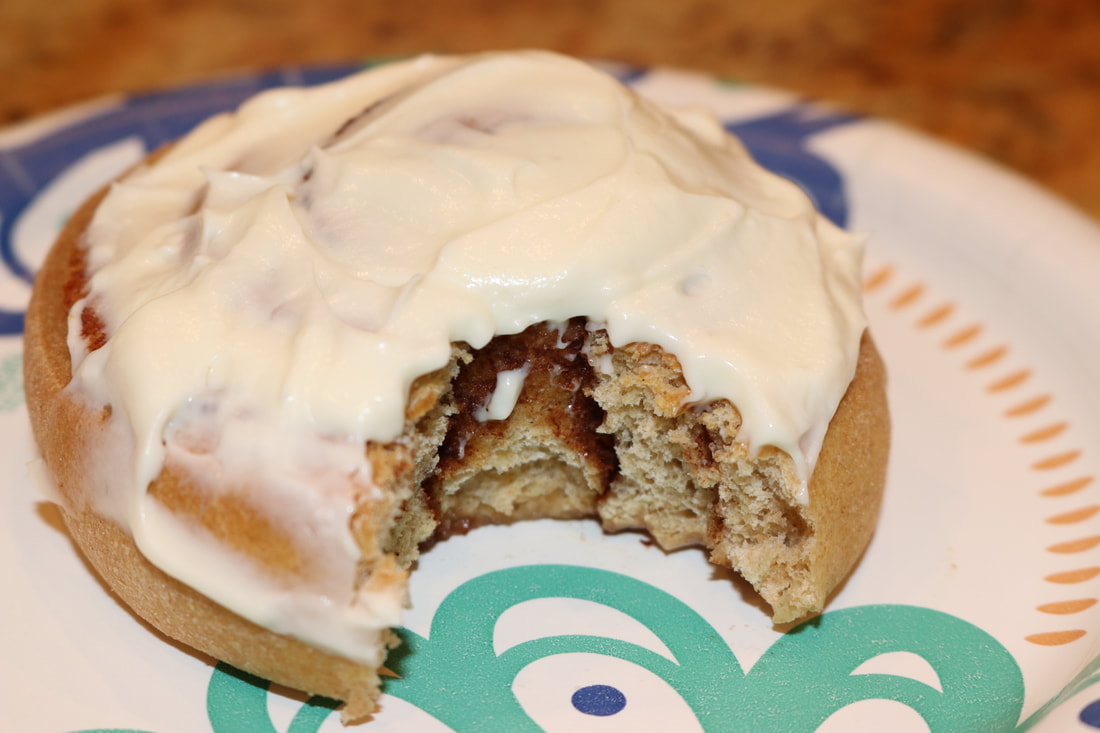
 Did you know that cinnamon can actually be used as a medicinal herb? It can be used as an anti-bacterial, and it's also known to kill stealth bacteria in our bodies like micoplasma! Who knew?! I have a lot of healthy recipes I've been trying lately that are going to go up on here soon, but I had to postpone all of those because this recent recipe I just made was ABSOLUTELY AMAZING! This recipe taught me so much about clean eating and how you don't have to eat bad tasting food to eat clean. These cinnamon rolls look, taste, smell, and make you feel amazing! I don't know why anybody would feel like they need processed sugars and other processed food in their lives when they can eat something this delicious and nourish their body with proper nutrients at the same time! These rolls are made with organic, whole wheat flour, and they're about 98% sugar free, and 100% refined-sugar free! The only refined sugar in these babies is a little bit of raw honey in the dough, and then the filling and frosting is sweetened with Lakanto sweetener which is not processed in your body the same way sugar is. Lakanto is an amazing sweetener that is made with Monk fruit which is a super food and filled with nutrients! You can purchase Lakanto here and you can also find it on Amazon! The BEST Healthy Cinnamon Rolls!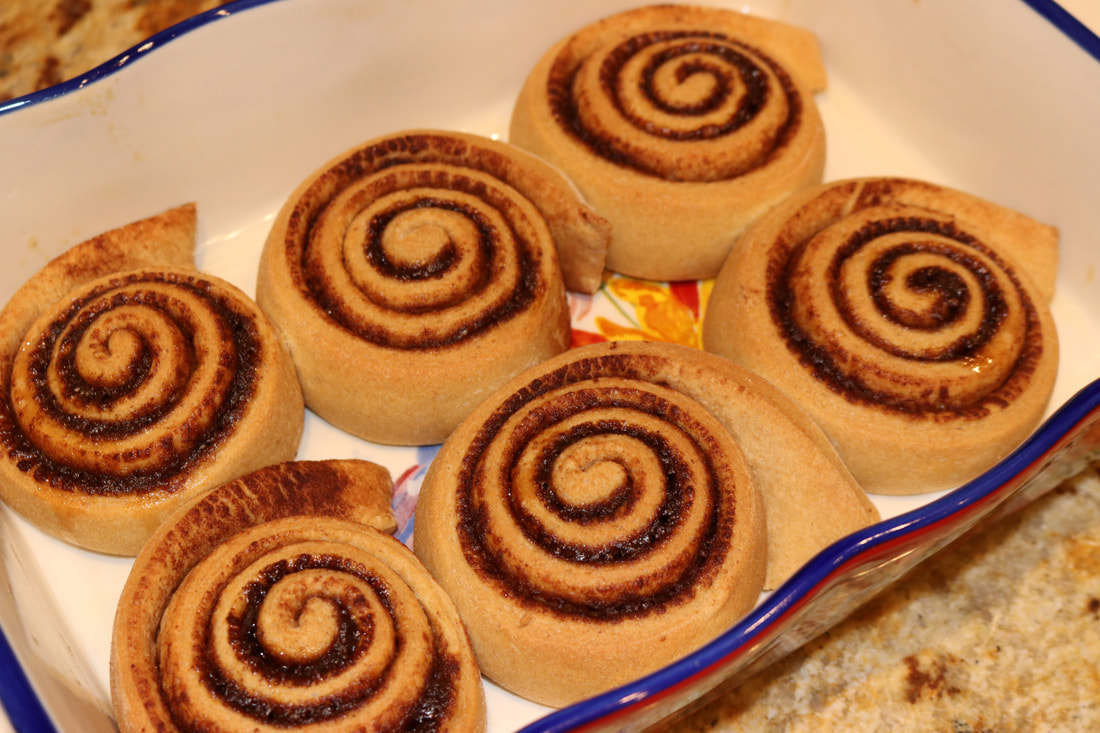
Ingredients:
Dough: 1 cup warm coconut milk (110° F) 2 eggs 1/3 cup butter (melted) 4 1/2 cups organic whole wheat bread flour 1 tsp. salt 1/4 cup raw honey 2 1/2 tsp. yeast (do not use instant yeast! Instant yeast is highly processed) Filling: 1/2 cup golden Lakanto sweetener 2 1/2 Tbs. ground cinnamon 1/3 cup butter (melted) Frosting: 1 (8 oz.) package organic cream cheese 1/4 cup butter (softened) 1/2 cup powdered Lakanto sweetener 2 tsp. vanilla extract 1 pinch of salt Directions:
*These rolls stay super fresh for about five days if you store them in the fridge! Then when you're ready to eat them you can either warm them in your warming drawer on high for 10 mins. Or you can preheat your oven to 350°, turn it off once it's fully preheated, and place your rolls inside for about 10 mins. Then when you take them out it will be like having a freshly baked cinnamon roll! *Use organic ingredients when feasible.
|
Welcome to My Kitchen!
Food is one of the greatest forms of science, art, medicine, and sustenance all at the same time! It's what feeds our lives and pumps through our blood. It's what connects us and what gives us energy to fulfill our purpose. It is for that reason that I have a deep passion for discovering, cooking, and eating only the most nutrient dense foods. In my kitchen, we only use organic, whole ingredients that feed the body, as well as the mind and soul. My hope is to inspire healing through healthy AND delicious food that feeds not only our stomachs, but also our hunger for connection and quality of life.
Archives
March 2022
Categories
All
Remember, when we spend our money on the most nutritious and whole ingredients, our dollars become our vote for healthier living, and happier lifestyles.

|
Blogs |
Chronically Claire |
|

|


 RSS Feed